Alex Garnett
Getting a working CUDA and PyCUDA environment under bash on Windows (May 2018)
I tried to make CUDA work the way I wanted under Windows recently, and it was enough of a pain that it seemed worth writing up. Although Nvidia’s CUDA packages have been fully-featured on Windows for a while, there are a few fairly severe gotchas, owing to Nvidia only officially supporting the Visual Studio compiler toolchain on Windows. I never touch this – I’m not a Windows dev other than insofar as if I have a machine with a GPU attached to it I tend to want to play a game now and then, so I’d rather not only boot Linux – and if I’m compiling something on Windows I’m normally using the mingw version of gcc under bash. The Microsoft-sanctioned developer environment means nothing to me, and I’m not willing to even try to do real work in a cmd shell.
Unfortunately, the official Windows Subsystem for Linux (the Ubuntu environment that you can install under Windows 10) isn’t useful here either. That’s a great project with some really effective people on it, but the GPU isn’t addressible in any way under WSL (which is also why you have to pass --no-gpu arguments to a lot of graphical apps running under X that way to avoid them crashing). Luckily I never really got used to working exclusively under WSL (other than when I need a CLI tool that’s needlessly difficult to install without a real package manager, like unoconv), and my Windows shell of choice is still good old Git bash.
Git bash is the distribution of mingw (which is like Cygwin but more native and less like a virtual environment, if you haven’t been paying attention to the past decade of *nix-on-Windows) that’s provided by Git on Windows. It works great, and you can even call it from a nice terminal emulator like ConEmu so it has tabs and all kinds of modern features and almost doesn’t make Windows feel like a second-class citizen for doing shell stuff. It uses all of your regular environment variables and silently translates Windows paths into POSIX-style paths so commands like cd /c/Users work as you’d expect, you can launch graphical apps that way, and so on. It’s very civilized. For me it looks like this:
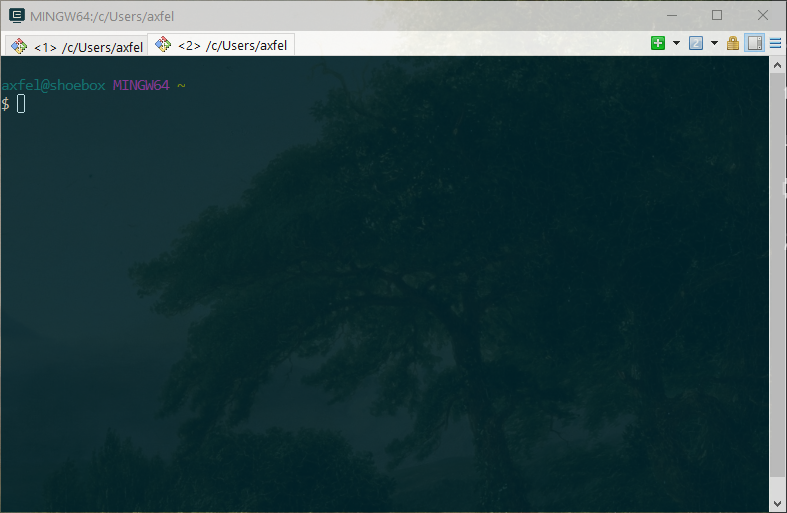
You can set it up that way in ConEmu without too much trouble. I won’t go into detail about it here because this article will already be long enough, but I recommend it!
OK, so, installing CUDA itself is pretty straightforward. Go to Nvidia’s website and download the newest version for Windows (9.2 as of this writing), and run the installer. Don’t forget to enable the Visual Studio extensions when installing CUDA; even if you’re not using Visual Studio itself much, you need them for building any CUDA code with CMake. One hitch is that the CUDA package includes the regular GPU driver and the GeForce Experience package but they tend to run behind the builds provided in the regular GPU driver download, and the CUDA package will helpfully tell you this so you can opt not to replace those versions when you’re installing CUDA – except, if you install CUDA with the regular driver components toggled off, it seems to partially break your driver install to the point where you can no longer launch the Nvidia Control Panel until reinstalling the regular driver through GeForce Experience, which in turn breaks the CUDA uninstaller, but thankfully doesn’t break CUDA itself. Whee.
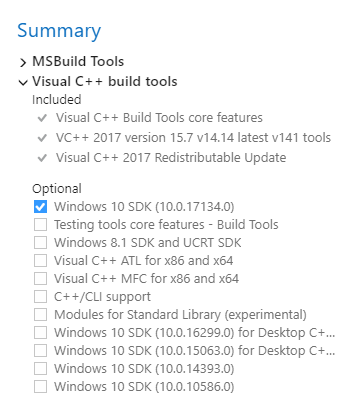
Now, like I said, Nvidia only supports the Visual Studio toolchain, so you’ll have to install that. The smallest free package that works for this purpose is alternately called the “Build Tools for Visual Studio 2017” or the “Visual C++ Build Tools”. It may be that you want the whole thing; I’m not a frequent enough low-level dev that I’m any more productive with a whole IDE and a profiler than I am with a good text editor and CLI, so this is what I went with. The installer will allow you to select a lot of optional packages; the only one you actually need is the Windows 10 SDK, as even if you’re not building “Windows Apps,” it doesn’t seem to set up stdio.h or any of that otherwise. I’m assuming mingw has its own stdio.h somewhere but it’s probably a safe bet that our two compilers do not want to be friends.
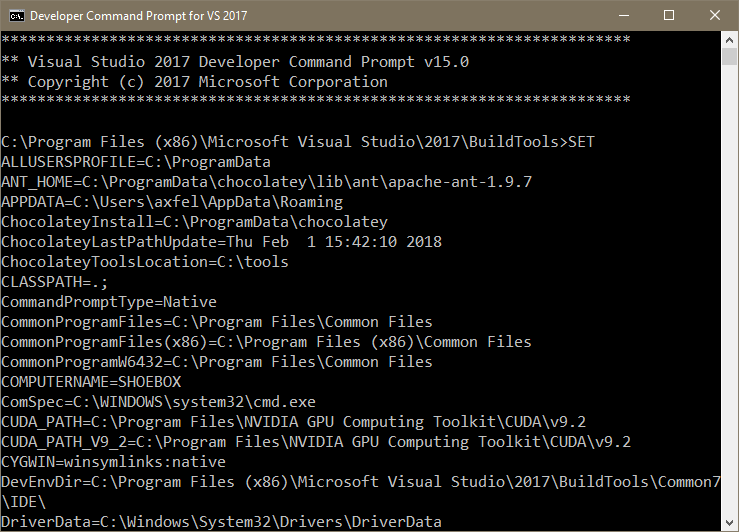
Now, you might think you’re all set, except – oh no – rather than adding all of the necessary path variables to your environment when being installed, Visual Studio 2017 instead adds a “Developer Command Prompt for VS2017” to your start menu, which launches a properly bootstrapped… cmd.exe
I tried to use this thing for about two minutes before completely losing my shit. I know Microsoft is new to this whole “usable CLI environments” thing, but … uh-uh.
The binaries we actually want to be able to call at this point are cl, which is the Visual Studio CLI compiler (detailed at https://docs.microsoft.com/en-us/cpp/build/walkthrough-compile-a-c-program-on-the-command-line), nmake, which allows cl to parse gcc-style Makefiles (even though it appears to choke on a lot of regular make syntax and I can’t imagine ever using it in place of regular mingw make or cmake otherwise), and nvcc, the CUDA compiler which should now be on your path but which will puke if run from a bash environment that isn’t bootstrapped to be able to use the VS compiler. Just putting cl and friends on your path doesn’t help, unfortunately; it can’t link to anything from there.
The cmd.exe spawned by the Visual Studio Developer Command Prompt launcher turns out to be bootstrapped by a single batch file that’s well-known in Microsoft land as vsdevcmd.bat and has apparently persisted for many years, but the version of it provided by Visual Studio 2017 has a bunch of if-then logic nested in several other batch files that bash isn’t even going to try to parse. So I decided to reverse engineer it.
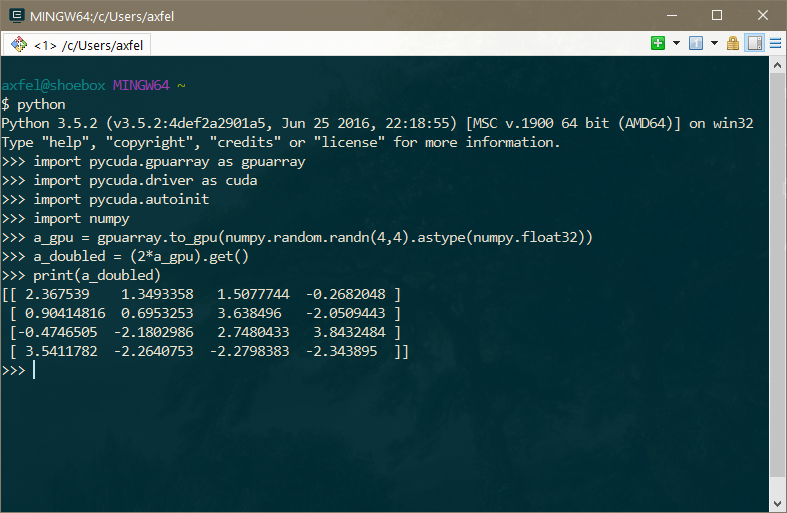
I determined that running SET in this cmd shell works like a regular env to dump out all your environment variables, and, on faith, set about replicating all of the paths that looked like they might possibly be Visual Studio related – INCLUDE and LIB and so on – to my regular environment. I used the regular Windows 10 dialog for this since it’s actually pretty nice and Git bash parses it normally on startup, but you could put them in ~/.bashrc or a shell script too. I wasn’t feeling proactive enough to do that in a redistributable way for this article, largely as I expect this to be pretty brittle between Visual Studio releases and wasn’t necessarily expecting it to work in the first place, but lo and behold, I eventually wound up with an environment that could do this:
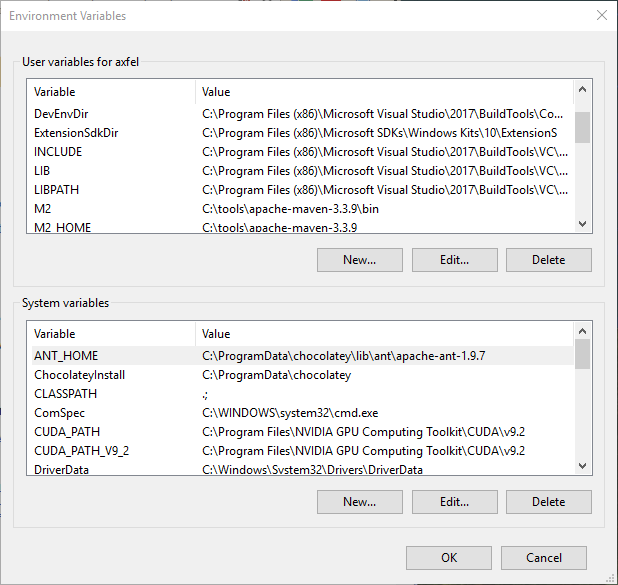
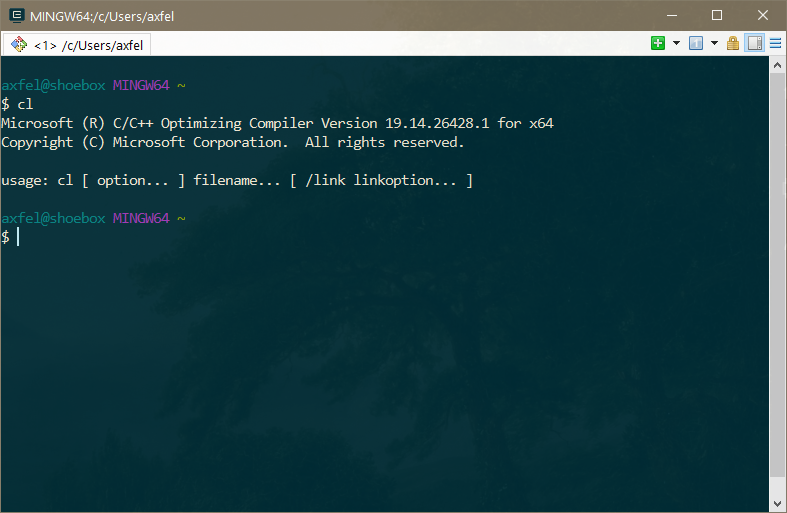
And that makes life a lot more pleasant, even if it’s way more path munging than I’ve ever had to do to make Git bash support anything else.
If you get an error about x86 vs. x86-64 when calling cl, make sure you’ve used consistent (probably x86-64) paths in setting up your environment; Microsoft is still doing its stupid “x64” naming convention and there seemed to be some inconsistencies in the shell launched by the Visual Studio shortcut when I initially copied the variables.
This whole song and dance is also necessary if you want to be able to use PyCUDA from bash, which you probably do, because I can’t imagine anyone would rather write C than Python if they can help it – PyCUDA will normally try to spawn an nvcc compiler process at runtime, which in turn tries to call cl, which will fail if it hasn’t been bootstrapped properly.
If invoking nvcc (through PyCUDA or otherwise) ever throws unsupported Microsoft Visual Studio version! Only the versions 2012, 2013, 2015 and 2017 are supported!, that’s because, as far as I can tell, Visual Studio versioning seems to be its own special form of hell, and third parties like Nvidia often fall behind in trying to targest the newest compiler point release, which is of course the only one that’s readily available from Microsoft. CUDA 9.1 was actually incompatible with VS 2017, as I discovered last month, but the newly-released CUDA 9.2 just thinks it’s incompatible. If you open C:\Program Files\NVIDIA GPU Computing Toolkit\CUDA\v9.2\include\crt\host_config.h, and line 131 looks like #if _MSC_VER < 1600 || _MSC_VER > 1913, you can just change the 1913 to a 1914, and everything should work fine.
Python also occasionally runs into this problem. Some Python modules, including PyCUDA, need to call a compiler when installed from pip, and most Windows Python releases only support Visual Studio compilers released up to a year prior, which is almost never the one you’re going to get by default (and wouldn’t have been on my path before now besides). Unlike Nvidia’s toolchain, Python/pip can actually be told to use the mingw gcc compiler if you already have a working make on your path by creating a distutils.cfg file per this documentation. Alternately, Christopher Gohlke has provided pre-compiled Python libraries for Windows for as long as I can remember, including PyCUDA; you can just get the one matching your Python/CUDA version and point pip to the local .whl file to install it.
Hopefully this will be more straightforward for you than it was for me, and you’ll get to have your CUDA cake and eat it too.